I agree with you. But what about if the STOP signal comes suddenly with no warning?

BUT!!!!!
The last theatre had used clear splicing tape so it was hard for the operator to find the reel splices I guess. On the frame lines, on both sides of the splicing tape, there was a silver paint streak like you get from one of those paint pens. Now I supose that this would have been ok BUT!!! The paint was not dry when that splice was spooled onto the platter so, you guessed it, there are silver blotches on the two wraps on either side of the splice. These blotches of silver paint are on the emulsion side and are in the projected image area.
How tragic! Another fine print is damaged.
Happy Halloween!
KEN
Everyone I know just uses clear tape and has no problems with platter breakdowns.
It was a really great job of handling film! The leadres were spaghetti in the can. Two of the leaders were stuck on in reverse, image out and tail in. All of the leaders were "tacked on" with a square inch of hand torn masking tape which bled adhesive into the emulsion side of the film. (the IPA cleaned that up nicely)
Is there anything that is safe for the image that will remove this silver paint? Are all of our patrons doomed to see those big black blotches in the center of the screen this week?
Your help is greatly appreciated. KEN
White Shoe Polish
Liquid Paper
Splice Tape that disintegrates and leaves adhesive behind
on peeling--usually white
Join Marking Tapes (strips of tape designed to be folded around
the edge to identify joins)
Masking Tape (except for non film use)
How about opaque splicing tape in general?
Mark
A can of smoker’s lighter fuel on a cotton bud will remove those marking pen deposits and tape gum. Also kept on the rewind bench Isopropyl Alcohol for cleaning, but it is flammable!
quote:
Does anyone want to start a list of items that should be completely banned from any and all booths?
.
.
.
Join Marking Tapes (strips of tape designed to be folded around
the edge to identify joins)
If you are referring to CPI Edge Mark tape, I find it quite useful. If it were totally up to me and everyone cared about film as much as I do, I wouldn't use it, but it is certainly better than zebra tape or shoe polish (or whiteout, paint pens, etc...).
Thanks for the lighter fluid information. I believe that it is also a burning agent as well as the existing IP Alcohol.
There is a can of WD-40 in the booth. It works well for getting the chewing gum off the floor when the downstairs folks have it on their shoes.
The nature of splices is such that they can be "felt" with relative ease and the pack level tape inside the reel flange lets you know when to look and if you missed it.
Thanks for the help, fellows.
KEN
1.) The contrast of light as it hits the top edge of the film is a dead giveaway for reel splices even if there is one or more lab splices removed. I usually pull my screening report to see how many were removed and then count the next splice over as the reel splice.
2.) You can feel the spice on the top edge of the film roll and you can slow down the MUT as you get near one.
3.) Run your MUT at 30% speed or just enough not to labor the motor when the reel gets full and with two fingers of your left hand feel the film between the top roller and the bottom roller of the MUT pole. And your right and at the speed and brake contol. When you feel the splice go through hit the brake and kill the speed. This method works 100% for me and I never miss a splice that way.
In the Multiplex I'm working now we are using a white pen to mark the print edge for fast breakdown. Unfortunately, as Kenneth noted, if the print is rewinded when white ink is not dry, the ink will leak on the frame and on platter rollers.....
I understand the need to mark the reel splices, the CNR Cinemeccanica platters are sooooooo slow to stop at maximum speed and you need to know exactly where splice is otherwise you'll have to re-engage the motor, rewind the print, stop, cut the splice, disengage the motor etc. etc. If you have to breakdown 2 or 3 prints in few time, you'll have to find something.
The white pens we're using are water based and it takes a lot of time to dry. Does exists an alchool based pens that dry in few seconds?
I used to see the chaning colours of the reels with my two no-platter projectors. Now it is hard to see the reel change in a semi-dark booth on the platter. I believe that a mark is important, I can also feel the splice but the CNR will stop in a thousand of meters and then to rewind it takes a lot of time.
I HATE labels, and everything that can be seen on the projected image. But I really to find out a reliable and valid way to mark splices.
Bye
Antonio
We do not have "split reels" for each reel. We have a different type of can you have. Our can contain just the reel that has to be placed on the makeup table. All reels has to be placed on the same makeup platter, so it is not possibile for me to mark the "fill line".
Daryl,
I agree with you. But what about if the STOP signal comes suddenly with no warning?
I mean: I know that the platter takes some time to slow down but if I do not have a mark on the edge of the print I'll never know when to stop it!
It isn't simple... 
Bye
Antonio
If we think we will have a problem finding a splice, such as on a print that has a bunch of splices in it, we take a black Sharpie marker and color in the edges of the splice between the sprocket holes and the edge of the film where the SDDS track would be. This is done ON the splicing tape, of course, so that when the tape is removed the inks goes along with it.
He has virtually NO problem breaking down prints. It takes him about an hour to break down a print. He almost never misses a splice by more than a few feet. Mind you, he's only been working for us since the beginning of the school year. I guarantee, by the end of the year, he'll be down to 30-45 minutes and STILL doing it right.
The first time we saw film with the edges painted using a white marker his comment was something like, "What stupid son of a bitch did THAT?"
My objection to the edge mark tape is the lateral (and focus) shift it causes. I wish it would peel without residue.
* In the interest of naming names, one consistent user of these markers is Classic Cinemas Elk Grove. I don't know if it's a company-wide practice but I often get prints from that venue as they do a lot of trade screenings there. The old 2 screen Elk Grove had one side set up for changeover for that express purpose although I don't think they knew how to run that way.
Anyone have any thoughts on whether this is a good or bad idea on non-SDDS prints? And idea if SDDS will balk at one of the tracks being tinted?
As for feeling for the splice -- that works well for first run prints, but us poor rep houses often get prints that can have a dozen splices around the joint, it does become important to be able to distinguish the correct splice to break. I have gotten prints were the joint was pulled apart but at the wrong splice so you wind up with the change-over cues either on the head of the next reel or you have footage after the cues that belong to the next reel.
When I do make up 6000ft reels (not often), I had been using white grease pencil on film edge -- not on the sprocket hole edge on the face of the film, but the actual thin edge of the film, i.e., making a visible circle when looking at the reel from the side. It is easily seen and it doesn't hurt the film, but most importantly, with a little film cleaner in a cotten pad, it comes off almost instantly. Then again, I sometimes wonder if it isn't better to leave it on so that the next guy doesn't have to re-apply anything more agressive....like white shoe polish.
I think the combination of a red line in the outer sprocket area on non-SDDS prints and the white grease pencil on the rim of the film roll should be enough for even a blind projectionist to make easy breakdowns.
Frank
As for the grease pencil, well I won't even go there.
Daryl
quote:
"He claims that since SDDS has duel tracks, he could still put it on one side and the processor would just use the other side, if it even needed to"
The SDDS would probably DCM on half of it's channels, but not actually drop out to analog. It's VERY annoying to me, but not too many people notice it.
The next problem is how to apply the white ink on the very edge fast and without the risk to leak it on the print.
Bye
Antonio
Also, if someone was breaking down at high speed and did not slow the platter down as the splice was approaching and instead opted for a hard brake, they wouldn't be working there long. I have never seen a platter MUT brake that did not cinch scratch the film. (The possible exception being the current line of Kinoton platters, which I hear do a nice job, but I haven't had the chance to play with one yet.)
Before SDDS came around, I never understood why the labs couldn't put a dark colored strip on the outboard edge for reels 1, 4, 7, 10, etc and a dark colored strip on the inboard edge for reels 2, 5, 8, 11, etc and dark colored strips on both edges for reels 3, 6, 9, 12, etc. It would be GREAT edge coding. If the strips could be made in different colors, then that would truly provide positive identification.
When I was working in my old one-screen theater, I've never mark the print with anything.
Now the rythm of the job is a bit faster and I must found a faster way to break down the film without damaging it.
Previously I breakdown a film on a Kinoton platter, no problem with it because
1. I saw the reel change by colour's change (the light in the booth was different. Perhaps Neon light is better to see the reel change?)
2. Kinoton platter slow down very fast and if you miss the splice, you had just to switch a button and the platter started rotating in the other way.
With CNR you have to
1. Re-engage the motor
2. Push "STOP" on the rewind bench
3. Wait few seconds
4. Switch to "build"
5. Push "START"
Find the splice SLOWLY (otherwise you'll have to make the above list again twice).
Then perform the same list upside-down.
Moreover, While the platter is completely free to spin, it is VERY simple to drop film in the floor because you pull the print a bit from the rewind bench and when you raise your eyes there are meters of print on the floor while the platter is still slowly rotating...
More, you speak about slow the platter down when the splice approach... Did you ever tried with a CNR?
You cannot slow down a CNR... slowly! The included Brake is useless, it takes hundreds of meters to stop the platter and usually the rewind bench stops itself faster than the platter, causing the print on the platter... dropping on the floor.
Ok, I can stop it using my hands but do you agree with me that it is not practical?
Brad, The Fill Line will be the best but I've already stated that in Italy cans are different from yours! We receive the reel in this way:
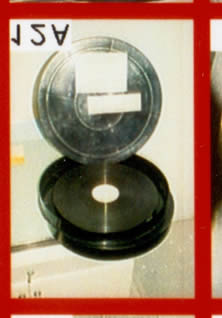
(pls sorry for the bad quality)
and so it is impossible to mark the fill line since each reel are rewindes on the same platter.
Brad, believe me, I would like to found an accettable solution, compatible with the multiplex life and with the "film done right".
Unfortunately CNR are, IMHO, just child's toys, with Kinoton I would not have these kind of problem.
Oh, just for fun: I know a friend of mine that has 14 CNR to project films, and ONE Kinoton.... to breakdown films!!!!
Any suggestion will be appreciated.
Bye
Antonio
I'll allow Splice Mark tape for reel joins nowadays. It is red, only 19mm wide and wont drop the digitals out. It also doesn't have a line to flash the screen. It is also available in 16mm wide (1.5 perfs on either side of the frame line) and even 8mm wide for the real daring. IMAX uses 8mm wide tape but they also use a zig-zag cut to prevent flexing at the join.
Steve
------------------
"Old projectionists never die, they just changeover!"
I recall that Deluxe Laboratories did offer the service of color coding the edge of each reel. They used the normal edgelight in the printer to print a different color along the edge of each reel. As you note, this was before SDDS claimed that area of release prints.
Long ago, labs sometimes printed the reel number (or letter) and an incrementing footage number on the printing negative, which was printed onto every print using the printer edgelight. Theatres and film exchanges could positively identify the reel number, and determine how much film was cut out at any splice. Even the numbers could be color coded for each reel by using the appropriate color filters in the printer edgelight.
For example, if the edgeprint went from C-1023 to C-1035 at a splice, it was the third reel, and 12 feet of film is missing.
------------------
John P. Pytlak, Senior Technical Specialist
Worldwide Technical Services, Entertainment Imaging
Research Labs, Building 69, Room 7525A
Rochester, New York, 14650-1922 USA
Tel: +1 585 477 5325 Cell: +1 585 781 4036 Fax: +1 585 722 7243
e-mail: john.pytlak@kodak.com
Web site: http://www.kodak.com/go/motion
You use a split reel or flange for breakdown, right? How about buying a pack of colored markers and marking rings in alternating colors every 100 feet onto your split reel? Sure it would take an hour or two to keep packing on 100 feet of film onto your sample roll, drawing the line, packing another 100 feet of film onto the roll, drawing another line and so forth...but you could do it like this:
500' RED
600' ORANGE
700' GREEN
800' BLUE
900' BLACK
1000' RED
1100' ORANGE
1200' GREEN
1300' BLUE
1400' BLACK
1500' RED
1600' ORANGE
1700' GREEN
1800' BLUE
1900' BLACK
Then when you build up the film, you could make note of the approximate footage count. Your tape on the leaders could be something like this:
R1 1850'
R2 1200'
R3 1750'
R4 1025'
R5 900'
R6 1900'
Then you can ballpark it to within 25 feet by looking at the colored rings during breakdown.
Clear tape with a horizontal white (or yellow) line across the tape every couple of inches. The idea being to place this line in the inboard sprockets, so that no digital track is obstructed and there is no mark on the frameline either. Such a mark is PLENTY to be able to see and identify it. Further lines are not needed. These lines need to be spaced such that the "tape stop line" does not end up in the picture either. For lack of a term, the "tape stop line" is what happens when splicing tape is stopped, then pulled again. It makes a line from edge to edge. That should be positioned to always be on the discarded area of the tape. I could probably "fake" a splice to look like this if my explanation isn't clear.
You listening  ?
?
Excellent Idea. I will try it!
Antonio
Likewise, using a fluorescent adhesive on the clear splicing tape that glows in ultraviolet "black light" is a good idea. (I just purchased a fluorescent "black light" on sale after Halloween for less than $10 US, that is bright enough to make fluorescent dyes glow across the room).------------------
John P. Pytlak, Senior Technical Specialist
Worldwide Technical Services, Entertainment Imaging
Research Labs, Building 69, Room 7525A
Rochester, New York, 14650-1922 USA
Tel: +1 585 477 5325 Cell: +1 585 781 4036 Fax: +1 585 722 7243
e-mail: john.pytlak@kodak.com
Web site: http://www.kodak.com/go/motion
Now I wish they went with a white line rather than magenta. The digital tracks are hopelessly out of focus when the two pieces of splicing tape are applied (even clear) anyway. A well made splice, even with opaque tape will not drop a digital reader out. However, going to a skinnier tape will better your odds. CPI has 19mm, 16mm and 8mm tapes (all available in the splice mark configuration) in addition to the more popular 24mm.
Neumade does have its 35mm and 16mm tapes if you want to try using skinnier tape with their products. I have yet to have a 16mm wide splice give up. Remember, IMAX uses just an 8mm wide tape and that film is under much more stress as it taverses it's film path.
Steve
------------------
"Old projectionists never die, they just changeover!"
Our new tape product T-stripe has the wide & thin line as with or Splicemark & cross stripe across the frame, but yellow with a white backing stripe for high visability.
It also has a pull-off area which is approx. 32 mm which you can use the thin line to cover the Sprockets on the non soundtrack side.
Its not the most economical way to use tape but it does what you want.
T-stripe is available from Jack Roe in the UK or CPI in the States.
#1 Never ever should there be a splicing tape line across the frameline so long as people are still making scope movies. Fortunately I have noticed that this tape can be used to ONLY cover the SDDS tracks, which is quite nice. However, since this alternates with the "T" stripes, the effective length of the roll is cut down by 2/3 because half of it gets tossed alternating between the "T" lines as well as bypassing the "stop lines" and then there is of course the obvious inch that is lost during the pull. This does not make it too economical of a tape to use. A tape with nothing more than appropriately spaced horizontal lines as described above would be much more cost effective without losing any of the visibility.
#2 My sample has horrid slitting. No matter how careful I am when making the splice, the edges are cut so poorly that it shows up on the projected image. I am told this is not the case on regular production rolls, but I need to see it just to be for sure before I can recommend it. As it is I am not happy with any marking tape on the market, but if a theater just HAS to have something, then I recommend Neumade's striped tape. If this slitting is good on the production rolls, then I will start ordering the T-stripe tape. (But will still be desiring just a "line" striped tape. )
Then again about 1% of the theaters I service and work/worked at refuse to use any kind of striped or opaque tape. I have noticed that *generally* the projectionists who really bust their humps to put on a flawless presentation refuse to use anything other than clear anyway, so it probably wouldn't be worth the cost to re-design another kind of tape because those theaters wouldn't use it regardless.
quote:
Remember, IMAX uses just an 8mm wide tape and that film is under much more stress as it taverses it's film path.
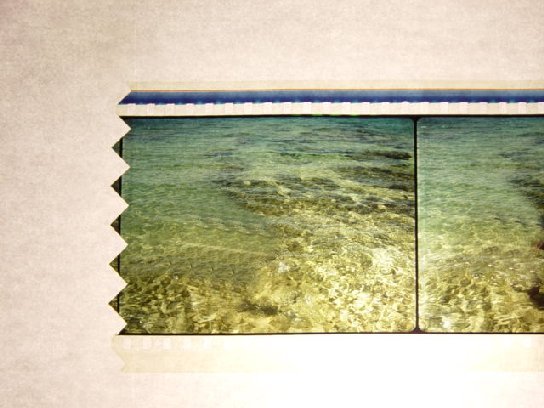
I was amazed at Bradford Imax last Sunday when the projectionist showed me the splicing technique just with 8mm tape. You can of course appreciate the strength of the join as the cut is sawtooth on a splicer costing £2,000. (over USD $3,000).
Picture taken of a splice cut. I have disguised the picture area to respect copyright.
------------------
John P. Pytlak, Senior Technical Specialist
Worldwide Technical Services, Entertainment Imaging
Research Labs, Building 69, Room 7525A
Rochester, New York, 14650-1922 USA
Tel: +1 585 477 5325 Cell: +1 585 781 4036 Fax: +1 585 722 7243
e-mail: john.pytlak@kodak.com
Web site: http://www.kodak.com/go/motion
A few points which we would like to publish to keep the public record balanced:
1 The roll of T-Stripe that you have was probably from ShoWest - which means that it was very new and we produced a few samples to give out at the Show. The samples we produced at that time were 5m long (rather than the usual 15m) and were to display the visual characteristics of the tape. Cutting may not have been to our usual high standard for finished product.
That said we are surprised that the tape edges would be more visible than anyone else's tape including Neumade when projected at 24 frames per second. With film editing where frames can be viewed one at a time on editing equipment, 8-perf tape (38mm) is used to avoid all film edge and that is the only true answer.
2 We have taken the time and effort to make sure that the lines on T-Stripe are accurate. To this end we have a well made (copyrighted and trademarked) product which truly takes into account the soundtrack requirements. Even with SDDS, the tape should not compromise the sound in view of the staggered redundancy built into SDDS.
3 The repeat length on Neumade striped tape IS smaller at 120mm compared to T-Stripe's 134 mm BUT as the Neumade reel is 10m and the T-Stripe is 15m, it follows that one reel of T-Stripe provides approximately 112 double sided joins compared to only approx 83 from Neumade. Since T-Stripe retails for less than Neumade on a per roll basis then T-Stipe has a markedly lower cost per join.
4. The cross stripe is there because the US market prefers it. Our Splicemark product does not use a cross stripe. If placed correctly, our the T-Stripe product does not appear in the picture area at all on Flat (which is most of the time).
5. As to your personal preference for Neumade, we are really surprised that given your stated preference for technical excellence you would choose a product where the cross-stripe cuts all of the soundtracks however you place their tape.
Jonathan
quote:
" As to your personal preference for Neumade, we are really surprised that given your stated preference for technical excellence you would choose a product where the cross-stripe cuts all of the soundtracks however you place their tape."
Ahem, I do not use nor endorse any tape other than clear. I believe I did state above that about 1% of theaters I have anything to do with actually request marked tape.
Yes indeed, the edge slitting is extremely important to make sure that the edge lines of the splicing tape do not appear on screen. So far no other manufacturer of tape I have used has exceeded the slitting quality of Neumade's. That comment is of course based upon clear tape. I haven't bothered to do much research into the marked stuff. Your comment that you would find it hard to believe that the lines would be visible at 24 frames per second is ludicrous. Do you see specks of dirt on a dirty film? Of course you can. Guess what, that dirt is NOT in the same place on consecutive frames. Each speck is on one single frame...and yet the human eye can see it...just like a splice line. I don't know what goober came up with the current widths of splicing tape, but it really should be a full 8 perforations to prevent this.
Sounds like the Splicemark tape is a better solution for people who can't run their booths without having marks at the reel joints. I haven't played with it. Have a sample?
I agree that 8-perf (1.5 inches wide) splicing tape is the best choice for 35mm prints, since the edges of the tape will fall on the framelines. Ultrasonic splices are also great for polyester prints, except that you lose two frames if you remake a splice, whereas you can peel off a tape splice without loss of continuity.
------------------
John P. Pytlak, Senior Technical Specialist
Worldwide Technical Services, Entertainment Imaging
Research Labs, Building 69, Room 7525A
Rochester, New York, 14650-1922 USA
Tel: +1 585 477 5325 Cell: +1 585 781 4036 Fax: +1 585 722 7243
e-mail: john.pytlak@kodak.com
Web site: http://www.kodak.com/go/motion
quote:
As to your personal preference for Neumade, we are really surprised that given your stated preference for technical excellence you would choose a product where the cross-stripe cuts all of the soundtracks however you place their tape.
Since any cross-stripe covers the scope picture area the cross-stripes shouldn't be used. I don't know about the T-stripe tape but the Nuemade zebra tape can be used with it only covering the SDDS track. If careful you can pull it far enough over so that if doesn't cover the outboard perfs (and SRD track) while staying off the picture area on the inboard side.
I used to use the red Splicemark tape. It worked well and was cut well. I can't remember for sure if it left any residue, but I don't think it did.
"T-Stripe can be applied on scope
film in such a way as to use 1 narrow band only, or 1 wide band only
or 2 narrow bands without cross-stripe if operators want to avoid the
cross stripe on scope.
In Australia for some years now the labs give us the stuff wound on cores, packed in a plastic bag with a cardboard seperator between each core.
By the time they have been around the traps a bit the plastic bags have gone as have the bits of cardboard and if the last couple of parts are small cores in overall diameter the bigger one/s on top cone downwards in transit so you have one unholy mess when you open up a box. It takes a fair degree of careful manipulation to get them apart without having the center come out of a part (reel).
So when you make stuff up there are no reel cheeks to mark so you do need a highly visible indicator to show where the reel joins are.
I use a steel tipped white correcting fluid called "Pentel" and mark(very carefully) the edge of the film so when it sits on the platter every join can be clearly seen.
I work from the cardboard boxes of film onto 6000' reels and load them from the MUT to the platter while I work on the bench doing the next 6000' reel until all is loaded. As it goes onto the platter I am watching that out of the corner of my eye while I wind the various parts onto the next 6000' reel and so on until all is done.
To pick up the splices on the bench on breakdown I colour the splice edge with RED spirit pen if the edges are clear (NON SDDS setup) and if dark I use the white Pentel.It comes off with the removal of the tape so all that remains on the film is a fine white edge to the film.
Frank mentioned multiple joins and as the group I work for use film from all manner of sources some of the stuff that passes thru looks like it has been attacked by a chainsaw as there are multiple joins at the end and start of every reel. This makes for quite exciting times trying to make sure you have got the right spot when you start to pull it apart. There are so many joins running it thru the fingers is not definitive enough, you have to watch and be a bit of a sleuth at times as often the previous operator has managed to hack off the cues (if any) and have bits of the end of one reel on the head of the next and so forth.
A lot of stuff comes from ScreenSound archives in Canberra (Aust) and much of this has NEVER been on a platter before it is so darn old. So that there can be NO error I ALWAYS leave one frame on the head and tail and then matching up is spot on.
In many cases these prints are the ONLY remaining ones in captivity so I treat them with care and spend a lot of time patching dried out splices and any film damage.
When the film is sent back it always goes back TAIL out with just one piece of tape holding the leaders on. In this way the next platter guy just peels it apart and if the next is not a platter the reel to reel guy can easily check for cues and whack a bit of tape on the other side to ensure a smooth joint.
Why so many just rip joins apart and do not spend just a few moments peeling the tape off is beyond me. It takes me about 8 mins per 2000' reel to make up a program and the same to breakdown so a few moments spent peeling the joint apart is nothing and it helps stop the idiots just chomping the next free of tape frame until the heads and tails look like a series of floppy cards. If I cop a spool like that at the outdoor on the reel to reel Simplex setup the old girls will shred those sorts of starts and ends so off it all comes and sometimes about a foot or more of film each end goes in the bin.
Back to cardboard boxes for shipping film... I have had prints come to me from Sydney across OZ and land in Perth with a couple of core wound spools hanging outside the cardboard box.
Apart from the dust and dirt, mechanical damage to outer layers was also evident but a bit of patching soon sorted out those problems.
The old metal trunks and spools inside was a much more secure way of shipping film but I guess with freight costs going up a reduction in weight was always going to be attractive to Distributors so I guess we are stuck with cardboard boxes and I reckon before long you fellas in USA will also cop them.
So once film has gone from first release sites it is almost essential that joins are clearly marked as we have no other way here of positively identifying joins.
Until I find a better way it is going to continue to be the Pentel pen.
Even with prints shipped on cores, I don't see any need to mark reel breaks for platter use unless the print is very splicy. I don't normally mark shipping reels, either, though, so maybe I'm just used to finding splices by feel.