This is topic Restoring Photo Printed on Textured Paper in forum Film-Yak at Film-Tech Forum ARCHIVE.
To visit this topic, use this URL:
https://ft-forum.com/ft/cgi-bin/ubb/ultimatebb.cgi?ubb=get_topic;f=8;t=006014
Posted by Randy Stankey (Member # 64) on 01-08-2010, 02:49 PM:
I've been working on restoring this photo for a couple of days. It's part of a project I was asked to do by a friend. I got all the other pictures taken care of but this one has been a bitch to fix up.
It was printed on textured paper and I can't figure out how to get that "golf ball" pattern out of the scanned result.
Here's the original:
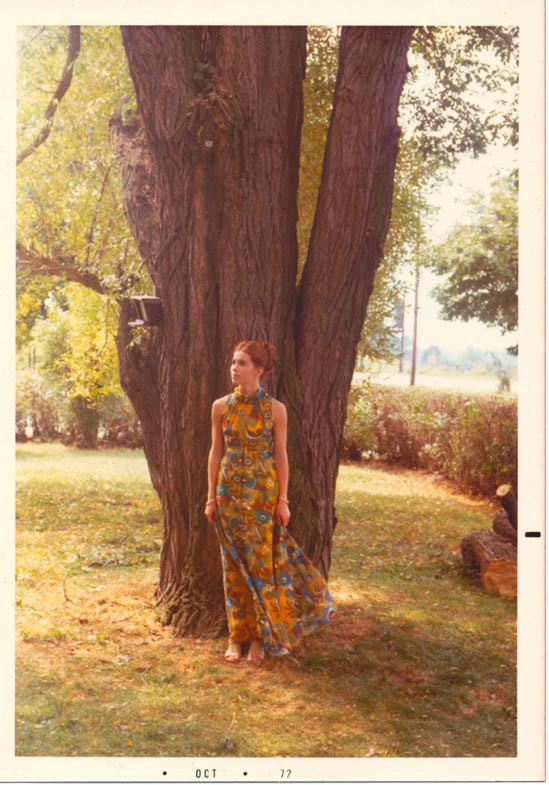
(Don't laugh! It was taken in the 70's! ![[Wink]](wink.gif) )
)
I'm not worried about the color. I can correct for that. I'm not even going to bother dicking around with color if I can't get the pattern out of the image.
If you look closer you can see the texture:
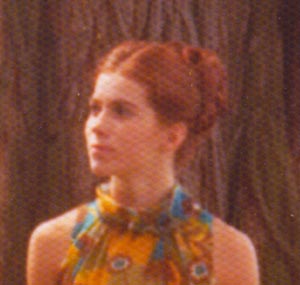
I've tried all sorts of things: Gaussian blur, Median and all kinds of layer blending to get it out. The best I can do is this:

But that is only a little better than if I scanned it at 2 or 3 times the intended final resolution then scaled it down to the final picture:

I have read on the internet where people have used Fourier Transform filters to remove some artifacts but I'm not prepared to pay for a Phososhop plugin that might not work.
Any ideas?
Posted by Kenneth Wuepper (Member # 1174) on 01-08-2010, 03:28 PM:
Randy,
Instead of scanning the photo, try re-photographing it with diffused light. In other words, try to eliminate the surface of the paper while capturing the image.
I have had some success using a white paper cone between the camera lens and the table top, like a tent with he lens at the top. Light the cone as evenly as possible and then photograph the result. I think you will be better off starting with this method.
KEN
Posted by Ian Parfrey (Member # 5122) on 01-08-2010, 03:52 PM:
Kenneth.
You beat me to the punch. Lighting the photograph from many directions usually removes the tiny individual "shadows" caused by the textured surface. I like Kenneth's tent idea, or you could use artists paper as either a reflector/diffuser. Also try different lamp heights and directions- just basically fool around 'till the pattern gets reduced or eliminated. Take your pick, Randy. Both methods will work.
Posted by Julio Roberto (Member # 4976) on 01-08-2010, 04:11 PM:
Good tips on difusing the light source.
I guess you tried the descreening option in your scanner's software to see if it works out in this case?
You can try out another descreening/fourier options as free demos to see if they work good enough before you decide on a purchase (if you think it's worthit).
http://www.descreen.net/
The "best" way to do it, considering you have the original, is to scan a white (or flat colored) area, like the margin around the picture, and use it to measure the pattern and its effect on the scan to then counter-act it with a custom filter.
But if you don't have an eternity in time and tools, then try out stuff like
http://retouchpro.com/tutorials/?m=show&id=185
and the free FFT filter http://www.3d4x.ch/swift/FFT_July2008.zip
Fast how-to video:
http://www.youtube.com/watch?v=C9JMROsx3Iw
Posted by Robert Minichino (Member # 3495) on 01-08-2010, 04:53 PM:
An FFT filter is definitely what you want. Here's what I did with your example:
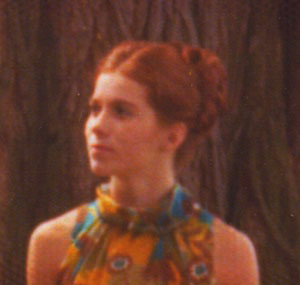
Posted by Randy Stankey (Member # 64) on 01-08-2010, 10:45 PM:
I think I got it! ![[Smile]](smile.gif)
(Or, at least, I have a breakthrough.)
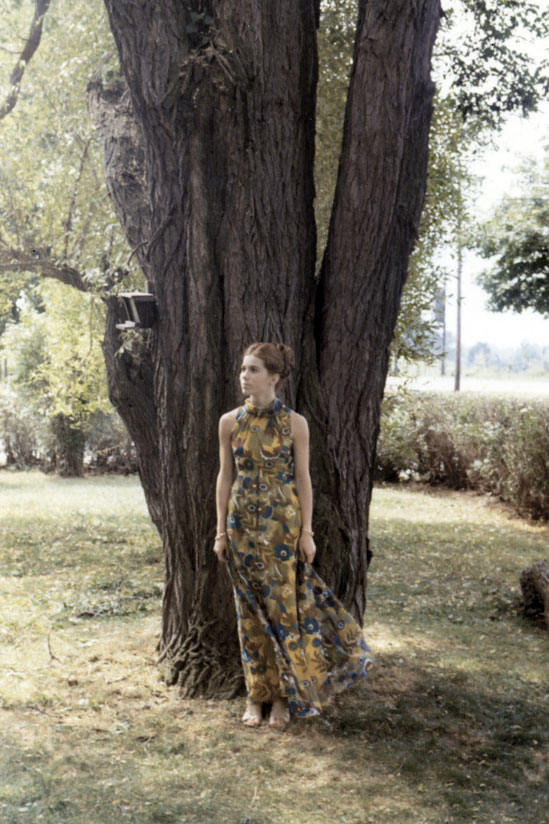
It was the FFT that I needed.
Thanks for the help, Julio and Robert. I just needed that extra bit of info so I could wrap my head around the process. Now I've got it figured out.
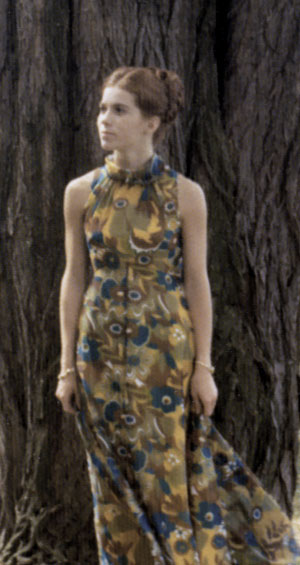
(Now that I look again, the exposure and colors still need adjusted. Don't they?)
A bit more tweaking and I think I've got it licked!
I was trying to use the descreen function on the scanner but it was only producing blurry images. I tried several screen settings and they all came out half-assed.
Once I got the idea of what the Fourier Transform did it got easier. Now I can practice and get it better.
BTW: I want to do this the "right" way and rephotograph it but my digital camera is just a point and shoot. (Canon Digital Elph) My film camera, a Pentax Super Program, vintage 1985 has a busted display inside the viewfinder. I can either use it manually as if it was a K-1000 or I can put it on full-auto and let the camera guess at the exposure. For copy work, the "guess mode" won't work and I don't have a handheld light meter.
Anybody know where I can get an old Pentax repaired for cheap?
Posted by Sean Weitzel (Member # 244) on 01-09-2010, 12:10 PM:
Cheap? probably not but done right? call this store in San Francisco and ask to talk to Vladimir: http://www.actioncamerasf.com/
Posted by Ian Parfrey (Member # 5122) on 01-09-2010, 04:03 PM:
quote: Randy Stankey
I can either use it manually as if it was a K-1000
Ah, the venerable Pentax K 1000. I have one myself, bought from new and has never missed a beat in 35+ years. SLR done right. Its such a simple yet bombproof camera that has everything I need and none of the fluff.
As an aside, I was on a canoe trip to Cairns in Queensland Australia in 1986. There was 5 canoes with people from all over the world. At lunch, I whipped out the Pentax and spun off a series of shots of the event.
As I was reloading, a Japanese couple approached me and the gentleman asked me in broken English what I thought of the K1000, and I gave him my unbiased opinion.
He then smiled to me and said that it was he who designed that camera and was glad to hear my comments. We chatted for a short while, then on returning to the canoes we promptly had a battle of the paddles and I'm proud to say that we both ended up in the river from upturned canoes laughing like crazy. It was a trip I will never forget made all the more memorable for the chance meeting of a very talented man.
To this day I still use that camera and wont ever part with it....partly because it's been a faithful friend, and partly because I'll always remember that Japanese gentleman's smile.
Posted by Randy Stankey (Member # 64) on 01-09-2010, 04:24 PM:
My brother has a K-1000. I suppose I could snag his camera for the job.
The K-1000 is the camera I learned with in high school. You can practically never go wrong with it. ![[thumbsup]](graemlins/thumbsup.gif)
Posted by Joe Redifer (Member # 3) on 01-09-2010, 05:04 PM:
How does one even go about installing that FFT plug-in? I just get an FFT_2008 folder with .8bt files in them. Dragging it to the Plug-ins folder does nothing.
Posted by Bobby Henderson (Member # 840) on 01-09-2010, 05:18 PM:
Make sure the plug-in is compatible with the version of Photoshop you're using.
The last couple or so versions of Photoshop, CS4 in particular, have been tricky in accommodating plug-ins designed to work with earlier versions of Photoshop. The same problem is evident with Illustrator too.
Posted by Julio Roberto (Member # 4976) on 01-09-2010, 05:34 PM:
I just dropped the .8bf files in the adobes photoshop\plug-ins folder (version cs4 11.0.1) and they appeared as "Fourier Transform" under Filters menu.
![[Confused]](confused.gif)
Posted by Randy Stankey (Member # 64) on 01-09-2010, 06:27 PM:
The "Free FFT" plugins Robert linked to don't run on Photoshop for Mac.
I had to search until I found "ImageJ" http://rsbweb.nih.gov/ij/
It is a free, cross-platform application that does mathematical image manipulations.
Tres geek.
Posted by Joe Redifer (Member # 3) on 01-09-2010, 07:35 PM:
That is odd that plug-ins for the same application need to be platform specific.
Powered by Infopop Corporation
UBB.classicTM
6.3.1.2